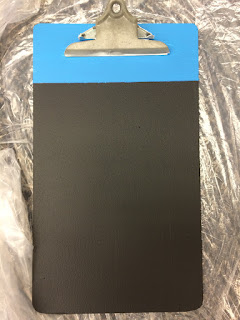
This summer, I had a lot of time to prep my classroom. I knew I had to do something about my old wooden clipboards. They were ratty and covered in scribbles. With the help of my SuperMom, I decided to give my old clipboards a makeover. I've seen some fantastic clipboard makeovers on Pinterest, but I decided to try something new. Wouldn't it be nice if clipboards served a dual purpose - where kids could also take notes without paper? I purchased chalkboard paint to give it a try.
   |
We could have taken out the clip hardware to be precise, but I don't think it was work all of that effort to be honest. I'm quite happy with the way that they turned out.
Note: Before using them, we have to prime the surface with chalk. I'll get the kids to rub chalk all along the black paint.
I think they turned out very nicely, but I think it would also have been very interesting if we had gone the Whiteboard marker route. I don't know about you guys, but I feel like kids seem to prefer whiteboard markers to chalk.
Let me know if you end up trying out your own version of these chalkboards!


